The Zoom app is an option for proctoring online exams. It is also suitable for conducting online classes. There is no restriction to the number of exams you can proctor using Zoom. While the app offers more flexibility in teaching, it also offers opportunities for students to cheat in Zoom exams
In this comprehensive guide, we explore tips and guides on how to use Zoom for instructors and students and state ways that students will try to cheat on the app.
When proctoring exams using Zoom, exams are given synchronously during the normally scheduled course time. This option closely resembles the in-class experience and, hence, is preferred by many faculties.
Zoom can be used to monitor exams and plays a huge role in discouraging students from cheating in examinations. Zoom can be accessed using mobile phones, which are affordable for a majority of students.
There are several features Zoom has that make teachers use it for classes. These features include a Whiteboard, simple setup, screen sharing, the raise hand feature, tools to manage learners, text chat, automatic video recording, and the ever-reliable video chat.
How to Prepare and set up for Zoom class or exam
Zoom can be used to proctor exams. Students will need a webcam to sit for an exam on Zoom. Webcams cannot entirely prevent cheating in exams but, to some extent, reduce it.
How to Prepare Days Before the Zoom Exam

- If need be, the instructor can request proctors for the exam. Contact the proctors and discuss how the exam will be done.
- Make sure that students sitting for the exams have appropriate locations.
- Have the students aware that they are required to have a good internet connection and a way to scan and photograph solutions.
- Notify the students to try to photograph and scan solutions before the exam day.
- Make sure that the students familiarize themselves with Zoom. That is, downloading, installing, and trying the Zoom software days before the exam.
- Make the students aware of how you will need them to upload their solutions, whether they must scan them or upload them as documents through email or Canvas.
- Make the students aware of the needed working space that will allow the Camera to see their faces, the paper they are working on, and the surrounding environment. The Camera will need to be two or three meters from where the students will be working.
- Notify the students of the materials and tools that they will be allowed to have when doing the exam. Notify the student whether or not calculators, books, notes, and headsets will be allowed during the exam.
- Send the students links to the Zoom meeting that will be used. When using Canvas, you can post the link on “assignments”
- Inform the students that they will be supposed to log into Zoom a few minutes before the exam starts. Instructors can set the time 10 or 15 minutes before the exam.
- Inform the students that they will be on mute for the whole exam period. Any questions about the exam will be sent through the Zoom chat windows. Remind them that they will be required to keep monitoring the audio stream for any announcements from the instructor.
- Inform the students that questions that may reveal confidential information about an exam are to be sent using the private chat with the instructor.
- Preparing slides that will contain the rules of the exam. The slides are to be displayed before the exam starts.
- Inform students of the proctors for the exam.
- Organize a dry session before the exam date where students can set cameras in the way that they will be sitting for the exam. The proctors can log on to view the student and then log off, and students can also write samples of documents, scan them, and upload them. Instructors can verify whether the scanned documents are readable or not.
- Use the Zoom settings and make sure that you familiarize yourself with them. This will avoid any inconveniences when setting up the exam and during the exam too.
Things Instructors should do Minutes before the Zoom Exam Starts
- Open Zoom and start the Zoom meeting.
- Using the advanced options, mute all the participants and turn on the video for the participants. Lock the mute settings using the Participant channel. Students will have to use the “raise hand” feature in case of any queries.
- Decide to make proctors host so that they can help mute participants
- Turn on the “record video automatically” feature.
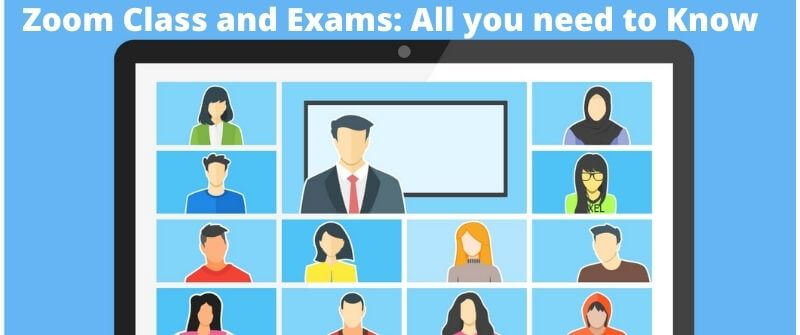
- Use the gallery view to make sure that they view multiple students at a time.
- Switch on the instructor’s webcam to make sure that students will be aware that they are being monitored during the examination.
- Remind the proctors that if they need to see what a student is doing in more detail, they can pin the video of the single students and open the single-person view.
What Instructors Should do at the Start of the Examination

- Remind the students of where they need to place the Camera for better viewing of what they are doing and their surrounding environment.
- Remind the students of the materials they are allowed to use during the examination. If they can use headphones, calculators, and other materials.
- Remind the students of the ways of submission of the exam. Whether it is through email, Canvas, or Blackboard.
- Remind the students that they will be on mute throughout the examination period and that questions are to be sent using the chat. Anything confidential about the exam should be communicated through a private chat.
- Remind the students that their webcams are to stay on until they are instructed to turn them off.
- Share a slide that consists of the rules and regulations that will apply during the exam period.
- Make sure that the cameras of the students are viewing the entire surrounding environment of the students and that no prohibited item is in the surroundings.
- Mute every student.
- Post the exam when proctors confirm that all students appear ready for the examination.
- Inform proctors to note when each student receives the exam to ensure that every student does the exam in the same amount of time as others.
Things Instructors Should Do at the End of the Zoom Exam
- Instructors should notify the students of the time left for them to complete their exams. This can be done when there are five or ten minutes left before the exam time is up.
- Instructors should inform the student verbally or using a Zoom slide that the time is up, and they should now submit the exams.
- Proctors should be keen on the students until they submit their papers and afterward inform them to turn off their webcams and the Zoom section.
- Instructors should be patient with the exam uploading because it may take a while.
- If any technical difficulties occur, allow for extra time, if possible, for students to complete and submit their exams.
Screen Sharing Tips for Zoom Class: When to and not to share

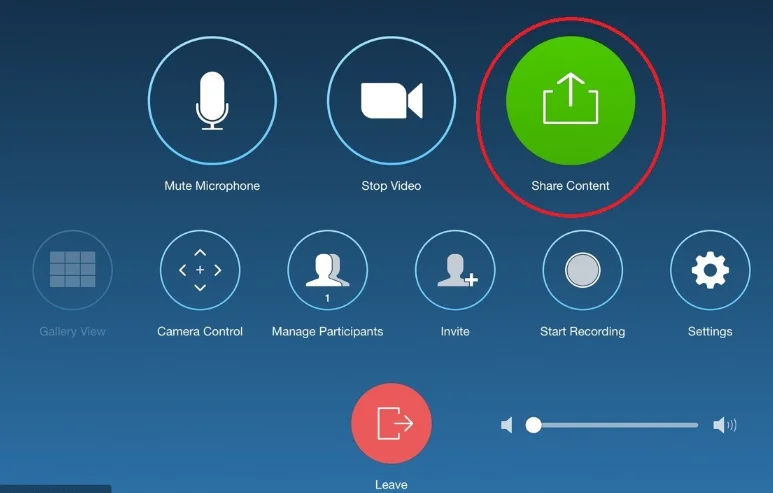
Instructors are given control by Zoom of what the students see. The default screen settings for educational users were updated by Zoom to prevent students from sharing random content.
Only the host or the instructors can share content in class because the “Host Only” set sharing privileges.
You can share a screen when you want to show students examples of solutions and notes. You can share a screen also when you want to offer more explanation on something.
Students can also share a screen when they need to show their work to their fellow students. Allowing screen sharing for students can be done through the host controls.
To do so use the arrow next to Share Screen and access the Advanced Sharing Options. Choose “All participants” under the “who can share” option and close the window.
It can also be done by changing the default screen sharing option on the Zoom settings to All participants or clicking the security icon and toggling the sharing privileges.
You cannot share a screen when another person is sharing. Only one person at a time can share a screen. As we noted in another guide of whether professors see your screen, it is only the host who can share the screen, and only the instructor can allow you to do that.
You should also not share a screen when the content on your window is out of context and does not relate to the audience of the meeting.
Instructors or hosts should ensure that those they permit to share screen have a good reason why they should be allowed to do so.
Tips on How to use Zoom in Class and be Attentive.
You can improve your Zoom class experience by following the following guidelines.
Tips to Prepare for Zoom Class Before the session:

- Install Zoom on your device and create a Zoom account to enable you to attend class activities.
- Set up your place where you will not distract the instructor or your classmates and where you will be able to focus well on the class.
- Familiarize with Zoom. You can join a practice session and familiarize yourself with all controls. Test your webcam and the audio as well.
- Familiarize yourself with keyboard shortcuts and Zoom accessibility features.
- In cases of special need for online courses, contact the Student Disability Access Center. Contact the center as soon as possible if you are deaf and need captions.
- Change the time zone if your location is not in the same time zone as the Eastern Time. to do so access the Online Meetings tools and edit the time zone to your time zone if it is different. Click update to set the time zone.
- Join the class early to make sure you test whether your video and audio are working in advance.
Tips for Student Zoom During the class
Mute your microphone to prevent background noise. Whenever you want to speak, remember to unmute your microphone. You can learn more of these tips.
Before you speak and say anything, think. You are just in a normal class. The only difference is that it is online. Use formal language and respect just like you do during a normal class section.
To participate in class, use reactions and chat. You can type your question in the chat session, whether it is public or private. If you need to talk, you can use the raise hand reaction to alert the instructor.
Different Uses of Zoom in Education
Zoom is used in education for teaching and learning. It creates the class mood even with students learning from home. Up to 500 students can attend Zoom classes.
1. Zoom class discussion groups
Group discussions can also be done via Zoom, even with members away from each other. Instructors can divide the class into smaller groups and bring it back together again.
Zoom can also randomly break students into groups. The groups can be pre-assigned before the class or assigned manually during the class.
2. Zoom class presentations
Zoom makes learning online easier because of tools such as whiteboards and screen sharing. Instructors can share a screen to provide more clarity on what they may be talking about.
Whiteboard is a brainstorming tool that enables students to provide different ideas mostly when doing group projects.
3. Using Zoom for Exams
Zoom can be used to conduct examinations. Through the webcam, monitoring of the students during exams is made easy. Zoom can be integrated with Learning Management Systems.
These include Canvas and Blackboard. These systems, together with Zoom, improve online learning and help reduce cheating during online exams. It should be known that students have devised ways to Cheat in online classes, and Zoom tests are one of them. So much care should be taken.
4. Recording and sharing Zoom lessons
Teachers can use Zoom to record and share lessons. The recording feature in Zoom can be used by teachers to create recorded sections.
These sections are suitable for students who lack internet connection to attend online classes or students who share devices with their siblings and are not available during the class.
5. Zoom for Flip Classes
Zoom classes have enhanced the flip classroom. This is where instructors give students materials to learn and then use Zoom classes to clarify more about what students learned.
Teachers show students how to apply the knowledge learned and answer all the questions students have after learning from the materials sent.
How Professors Prevent Cheating in Zoom Classes or Exams
Zoom is not a completely effective strategy to use to prevent cheating during exams. Professors can combine Zoom proctoring with several methods to help prevent cheating. Just like that, instructors can also use proctoring to prevent cheating in Google Meet classes as the two are related in use.
Setting the exam in multiple versions. No questions should be similar in any version. The professors should promote equality by making and setting all exams with the same scope and difficulty.
Open-Book Exams
Setting open book exams and being specific on the resources the students should consult. These resources make the consultation with unauthorized resources have very little advantage.
Avoiding setting questions that are found in books, widely accessible sources, or publications. They are questions that most students will have seen and may be tempted to look into the source materials to get the answers during the exam.
Setting questions that are not readily answerable through books or the internet will help evaluate the students thinking.
Random multiple questions
Building multiple versions of questions and distributing them across students. The student will not locate a student with a question similar to his.
Therefore, will have to answer the question on his own. This method can help even detect cheating because a shared answer is correct on one question only.
Using Canvas or Blackboard
When using Learning Management Systems such as Canvas and Blackboard the professor can minimize collaboration between students and any form of cheating by using the a number of settings
One, they can make one question available at a time; students must submit an answer to a question before proceeding to the next. Second, they can present the questions in a random order.
Thirdly, they can avoid going back to the previous question after submitting the answer. These are tough settings, and students should be coached on how to do such exams.
Allowing them more time should be considered when these settings are put in place. This way, there is time to set good questions and time for students to submit them.
Ways Students Use to Cheat in Zoom Exams
1. Having Mobile phones
Cheating using mobile phones in online exams is very common. Students can store answers on mobile phones and use them in the exam.
Students can connect their mobile phones and spread answers to each other. External sources are also accessible using phones.
2. Using Navigation offers

The internet and social media tools have been used by students to cheat during examinations, especially when the instructor is not seeing them.
Students log in to websites that are unauthorized, paste questions in the URL section, and get answers immediately.
Read more about the methods of cheating in online classes that students apply and how to prevent cheating in online exams to ensure integrity.
3. Auto coding software
During school tests, students can use the auto coding software to clear the exam. The candidate will not type anything, but the software will create a program that clears the exam.
4. Using External devices
This is mostly used by students who sit for the same exams in shifts. The students who do the test first hide devices such as USBs and microSDs, which are hard to detect, and enter them into the exam room.
They make a copy of the exams before they finish and sell it to students who have not sat for the exam.
5. Help from family and friends
These people always settle on places where the webcam cannot detect them. They access the questions, do them, and share the answers with the students. They can write the answer for the student to see or whisper it.
6. Deliberate exit from the test
Students with the aim of cheating in online exams will try to exclude themselves from the exams. They will blame the internet connection or the outage of power.
Once they exit, they will quickly look for answers and log in again to continue with their assessment.

